Migrating Git Repository
- Original tutorial by: Krisjanis Rijnieks
- Your lab name: Aalto Fablab
- License: CC-SA-BY
- Last Review Date: 19 Jan 2019
- Last Modified by: Krisjanis Rijnieks
Summary
Reasons for moving a repository can be plenty. However, this tutorial targets continuing Fab Academy students with the need to move their documentation to the current year GitLab repository.
Step 1. Clone Old Repository
If you have not touched your documentation for a while, it might be that it is not on your hard drive anymore. Worry not, all you have to do is to navigate to your GitLab repository from last year and clone it.
On the repository page copy your repository address. Take a look at the picture below to see what we are looking for.
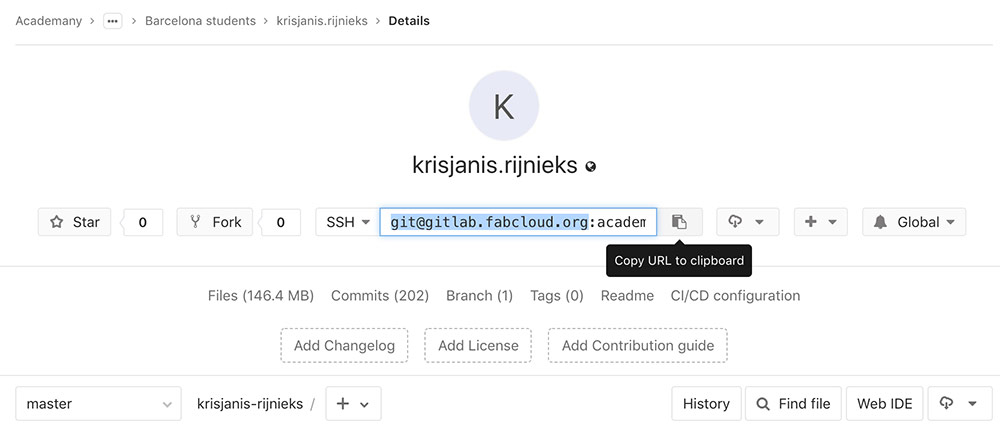
Hit the Copy URL to clipboard button to copy your repository address into the computer memory. Then open your Terminal, cd (change directory) to a place you want to store it on your hard drive and use the following command to clone it.
git clone paste-your-repo-address-here old-repo
When that is done, you should be able to see a directory old-repo when you type ls (list). Use cd (change directory) to enter it.
cd old-repo
At this point you should be able to run git log and see what are the latest changes you did to your documentation.
Step 2. Clone New Repository
If you are a continuing Fab Academy student, you should have access to your current year repository. The web interface should look similar to the one above.
Click on the Copy URL to clipboard button to copy the repository URL to your computer memory. Use cd (change directory) to navigate to a safe place on your hard drive and clone your new Fab Academy documentation repository.
git clone paste-your-repo-address-here new-repo
This will create a directory new-repo on your hard drive.
Step 3. Delete Existing Files (from new-repo)
The repository might not be empty. If it is the case, enter the repository directory and delete them.
cd new-repo
rm -rf ./*
You can also do this by using your favorite file browser.
Step 4. Copy Files
Now it is time to copy all files from your old repository to the new one.
Warning: This will not transfer the commit history from your old repository.
You can use your favorite file browser or use the command below.
cd new-repo
cp -R ../old-repo/* ./
This will enter new-repo and copy all files from old-repo there. We use the -R flag here to make sure that the whole directory structure is copied.
Warning: If your repository contains hidden files, make sure you copy them separately.
Step 5. Commit and Push
Now that all your old files are in a new place, you should make a Git commit and tell its history about it.
git add .
git commit -m 'Add files from last year'
Now your Git history is set and you are ready to push to remote.
git push origin master
It might take a while. Make sure you have good internet connection.
Step 6. Change Links
Lastly you should change all links pointing to your old documentation website so that they point to the new one.
Problems faced and solutions
My new GitLab repository contains weird files!
Follow the tutorial carefully, it instructs you on how to delete them.